Showing posts with label origami. Show all posts

Friday, June 22, 2012

Origami Hopping Frog

Today I want to share with you an origami frog. I especially love this pattern because it provides more details and it is easy. I hope you like it.


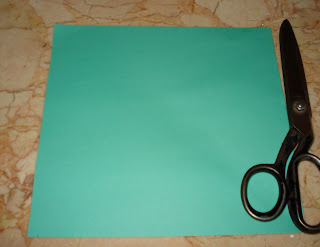
We will start with a white or colored paper. Today, my sister Olive Oil draw some circles on a white paper with crayons. You can use a colored paper too.


Fold the paper in half and fold each half in half diagonally to make two triangles, then cut the remaining part.


The aim is to have a rectangle composed of two equal squares. Make two diagonal creases in each square.


With the help of the fold lines, make a triangle from each square.


It will look like this. Now bring this end to the upper tip and fold.


Then fold it again by half.


This is the first leg of our frog.


Do the same with the other legs and you are done working on that side.


Turn it around and bring the two free ends to the middle.


Fold the lower part.


Tuck the two sides inside it.


Now you have your frog.

Enjoy!

Sunday, June 3, 2012

A Cawing Crow

This crow is one of the first origami projects I learned as a kid. It is especially fun for a child because it is interactive. If you hold it by the wings and bring them closer and apart, the crow will open and close its mouth while you mimic its cawing sound. Believe me it interests even the adults.


We start with a square of colorful paper. Fold it in half to form two triangles and then unfold it again. We just want the middle line to guide us.


Fold one side of the paper along the middle line.


Then the other side.


Then do the same with the lower part. Note: you can turn the paper upside down and do this step if it is easier for you.


Unfold everything. Make a horizontal crease in the middle of the paper.


Re-fold everything again. You will have an upper triangle and a lower one with two pockets in the middle.
Fold the paper by putting the tip of the lower triangle on the tip of the higher triangle while keeping the two pockets stick outside.


Now you have the base of your crow, its body and two wings.


Fold the upper triangle to start making the lower part of the beak.


Fold it to the left and then to the right as shown.


Use your fingers to form the lower beak.


Do the same steps to the upper part and you will have a perfect beak.


Now all you have to do is join the two wings together and apart while making a caw sound :)

Enjoy!

Monday, May 28, 2012

Paper Box

What about getting busy folding this wonderful box?


We will start with a square of paper about 20X20cm to get a box of around 8X8 cm. You can use a bigger or smaller piece according to the size you have in mind for the final box.


Fold the paper to form a triangle.


Fold the first triangle to form a second triangle.


Make a crease in the middle of the upper triangle.


Put your finger inside the smallest triangle and lift. A square will be formed.


Turn it over. Do the same as you did on the other side. Form a square.


You will have two squares facing one anotherMake a crease in the middle.


Make another crease in the upper part.


Fold the first one.


Then fold the second. 


Do the same on the opposite side.


Now, we will work on the flat sides. Fold the upper tip.


Then fold the sides.


It will look like this.


Do the same on the opposite side. Then fold along the middle line.


Make a crease along the lower line. 


Tuck it below. Then do the same thing on the opposite side.


You are almost there, just open the inside while pushing up the bottom.


It will start to form.


Now you have your wonderful box ready to be used.


The finished box.


Hope you like it!