Thursday, May 31, 2012

Mobile cover

I have been wanting to make a cover for my mobile phone for a while. I have worked with plastic canvas before and made mobile covers for my sisters. This one for Olive Oil:
 النهاردة فكرت أعمل جراب للموبايل بتاعي بدل ما هو متشرد كدة ومرمي في قعر الشنطة. وأنا كنت عملت جرابين قبل كدة لأخواتي بالبلاستيك. واحد لأوليف أويل


and this one for Shosho:
وواحد لشوشو


But today I wanted to try out something new. I wanted to try stitching on canvas instead of using this plastic yarn whose name I do not know!!!
Since it was very hot outside, I did not go out to buy yarn. I had to choose from the colors I found at home. This is the result, what do you think?
بس المرة ده قلت أجدد وبدل ما أشتغل على البلاستيك بالخيط البلاستيك أشتغل بخيط التريكو العادي، ونظراً لأن الدنيا كانت حر النهاردة قررت مش هخرج أشتري خيط، وهختار من الألوان اللي باقية عندنا في البيت. وده كانت النتيجة، إيه رأيكم


To do this project, I used:
- A piece of plastic canvas
- Some colorful yarn
- Any design
- A needle
- A key chain
عشان أعمل الجراب ده احتجت الأدوات الآتية
قطعة بلاستيك مخرم
خيط ملون
رسمة أو تصميم
إبرة
ميدالية


I started with a square of plastic canvas twice the width of my mobile phone. Then I added another 2cm to the width and the height. Tip: when you join the sides together, it kind of tightens.
نبدأ بقطعة بلاستيك عرضها ضغف عرض الموبايل، وبعدين نزود اتنين سم إضافي للعرض وللطول، وده نصيحة مني ليكو مهمة جداً، لأن مع الخياطة النهائية الجراب بيضيق، فاحنا نكون ناصحين وموسعين من الأول


I found these flowers online (http://cross-stitch-addict.blogspot.com/) and I wished to stitch the whole design but my cover was not that big. So I had to use the smallest flower only.
بالنسبة للرسمة اللي استخدمتها أنا لقيتها على النت على الموقع المذكور أعلاه، وكان نفسي الصراحة أعملها كلها بالفراش بس مقاس الجراب صغير ميكفيش كل ده، فاضطريت أعمل الوردة الصغيرة بس


I started with the green color, then the red, trying to put one flower at each side of the cover.
ابتديت شغل باللون الأخضر عشان أعمل فرع الورد، وبعدين اللون الأحمر، بحيث أضمن إن فيه وردة في كل جنب


Then I worked my way through the background.
وبعد ما خلصت، عيشت مع الخلفية


At this point I felt I wanted to frame the image and forget all about my mobile phone. I like it more this way :)
وفضلت أشتغل في الخلفية لحد ما قلت ده لوحة فنية عظيمة، أنا أبروزها وأعلقها، بس لما بصيت للموبايل صعب عليا وقلت يالا مش خسارة فيه


Then I joined the sides together and closed the bottom.
بعيد رحت مخيطة الجزء السفلي والجنبين في بعض بحيث تكون جراب


A final touch is to fasten a chain.
كدة مش ناقصه غير ميدالية 


Now I can say: My mobile phone has a cover.
وده شكله النهائي والموبايل جوه


Enjoy!

Tuesday, May 29, 2012

Nipa, the Key Chain

Today we will use polymer clay to make this key chain. When we were young, we used to read a story whose heroine was a Nubian girl called Nipa. My sister decided to make this key chain to remind her of Nipa.
النهاردة هنعمل ميدالية مفاتيح بالفيمو. واحنا صغيرين كان فيه قصص بنقراها البطلة بتاعتها بنوتة نوبية اسمها نيبا. الميدالية ده عملتها عشان تفكرني بنيبا


You will need different colors of polymer clay, a wooden roller, and some shaping tools.
هنحتاج عشان نعملها شوية ألوان، أهم حاجة الألوان الرئيسية وبعدين ممكن نخلط براحتنا، كمان هنحتاج نشابة او حاجة نفرد بيها، و دفرات للتشكيل


She mixed orange and purple to reach the required brown color needed for the face and hair.
أول حاجة عملتها إني استخدمت اللون البرتقالي والبنفسجي عشان أعمل درجتين من البني، واحدة للوش والتانية أغمق للشعر


Once you have the right color, make a circle to form the face. 
لما وصلت للون مناسب عملتها على شكل دايرة عشان الوجه


Next is the hair tied with red bands.
باللون البني الأغمق عملت الشعر وكمان عملت باللون الأحمر ربطات لشعرها


Now you can add small white circles and even smaller blue dots inside them to make the eyes.
بعد كدة عملت دايرتين صغيرين باللون الأبيض وجواهم دايرتين أصغر باللون الأزرق وحطيتهم عشان أعمل عينيها


Give Nipa a nose and orange puffy lips. You can also add a yellow hair clip. Finally fix a metal ring to the back where you will attach the key chain later. Leave her 10 minutes or so in the oven and there you have Nipa and her mother.
بعد كدة بنفس لون ربطات الشعر عملت مناخير صغيرة لنيبا وشفايف برتقاني.وعشان أخلي ألوانها مبهجة أكتر حطيت لها فيونكة صفراء في شعرها. ركبت لها الحلقة المعدن بتاعة الميداية من الضهر. ودخلتها الفرن عشر دقايق عشان تنشف. وآدي صورة نيبا ومامتها


Our Tips:
1. Make sure to wash your hands before switching to another color because if you do not, you will find traces of the first color on the second.
2. We found it easier to use the roller on a plastic sheet, for it is easier to remove the clay from a plastic sheet than to try removing it from a solid surface.
3. Bake a trial piece of clay first to know the exact required time before baking your project. If you leave it for so long, it will burn :(

نصائح
*بعد ما تشتغلي بأي لون من الفيمو لازم تغسلي ايديكي عشان اللون الأول ميتنقلش من ايدك للون اللي بعده
* لو جربتي تفردي الفيمو بين كيس بلاستيك الموضوع هيبقى أسهل كتير من انك تفرديه مباشرة بالنشابة
* قبل ما تدخلي القطعة الفرن لازم تكون جربتي الفرن قبل كدة في تسوية الفيمو، عشان تعرفي هياخد وقت


Enjoy!

Monday, May 28, 2012

Paper Box

What about getting busy folding this wonderful box?


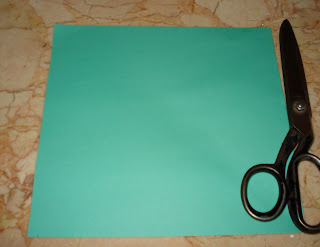
We will start with a square of paper about 20X20cm to get a box of around 8X8 cm. You can use a bigger or smaller piece according to the size you have in mind for the final box.


Fold the paper to form a triangle.


Fold the first triangle to form a second triangle.


Make a crease in the middle of the upper triangle.


Put your finger inside the smallest triangle and lift. A square will be formed.


Turn it over. Do the same as you did on the other side. Form a square.


You will have two squares facing one anotherMake a crease in the middle.


Make another crease in the upper part.


Fold the first one.


Then fold the second. 


Do the same on the opposite side.


Now, we will work on the flat sides. Fold the upper tip.


Then fold the sides.


It will look like this.


Do the same on the opposite side. Then fold along the middle line.


Make a crease along the lower line. 


Tuck it below. Then do the same thing on the opposite side.


You are almost there, just open the inside while pushing up the bottom.


It will start to form.


Now you have your wonderful box ready to be used.


The finished box.


Hope you like it!

Sunday, May 27, 2012

Cute Butterfly

It is time to share something different with you. This time it is a felt project. My sister Shosho did this cute butterfly.


These are the elements Shosho used:
- pieces of red, white, and beige felt
- some wires to be used for the hands, legs, and antennas
- red yarn to sew the body, cap, and the mouth; yellow for the antennas;  beige for the face; and a brown yarn for the hair, hands, and legs
- polyester fiber for stuffing the body and head
- glue to fix the red dots to the wings and the wings to the body


Here are the exact measurements of the required pieces as illustrated in the book entitled "Lovable Mini-Dolls" by Terumi Otaka:


And here are the designs of all the needed parts:


Some tips:
- Remember to use one wire for both arms to make sure they will stay in place and move simultaneously. The same thing applies to the legs and antennas.
- Wash your hands before working with the white parts because they can be stained easily.
- The twist in the mouth shape is intended. Do not try to correct it :)
- Apply some rouge to the butterfly cheeks to give it a natural lively look.


Enjoy!

Bee with you

Do you love cross stitching as much as I do? If you do, you will like this simple and easy project a lot. It did not take much time from me and it can make a great gift. You may even add the name of your friend and sign your name below or you can use it in a card.


I came across the chart in a cross stitch magazine I had bought many years ago. The original chart was stitched on a white fabric with green corners. But I felt the yellow frame needed a strong color in the background. So I used this red fabric. What do you think?


I would love to see your own choice of colors. There was other similar designs and I will try to post them soon, so that you will be able to choose from them the one you prefer. As for this one, here is the chart:


and here are the colors you will need:


Download it now and enjoy the fabulous result!

Saturday, May 26, 2012

Crochet table runner


About 40 cm

and here is the pattern(moje robotki 3 2007):


Thursday, May 24, 2012

Desktop Calendar

خطوات بسيطة عشان نعمل نتيجة للمكتب

1- http://www.ii.uib.no/~arntzen/testcal/
أول حاجة ندخل على اللينك ده، نختار السنة وشكل النتيجة وواللغة والأسبوع بيبتدي من يوم ايه
وفي آخر حاجة نختار
pdf
ونضغط download
2- نطبع الصورة اللي نزلت لنا

 3- نقدر نبتدي نلونها ونرسم بحر في شهور الصيف وورود في فصول الربيع وممكن نطبعها من الأول على ورق ملون

4-هنلاحظ ان فيه خطوط منقطة وخطوط كاملة، الخطوط الكاملة هنقصها بالمقص 
 5- أما الخطوط المنقطة هنمسك مسطرة ونبتدي نتنيهم لجوة
 6- بعد ما تنيناهم كلهم نبتدي بقى نلزقهم بالصمغ واحدة ورا التانية
 7- وده شكلها بعد ما كملت
اللينك اهه تاني ياللا ادخلوا جربوها
http://www.ii.uib.no/~arntzen/testcal/